When you create a Mac app, a lot of code is created for you without you having to do any work. Just creating the app and running it shows you how much functionality has been generated. Part of that includes a default about box, which is 'adequate' but not exactly helpful.
In this note, I want to run through the options for extending the default about box to provide a more useful dialog.
The Default About Box
When the application was created, Xcode created an about box. You can’t see the code for this, but it is there and is accessible via the application menu.
If you select the about option from the system menu, a popup window will appear with the system generated about box content:
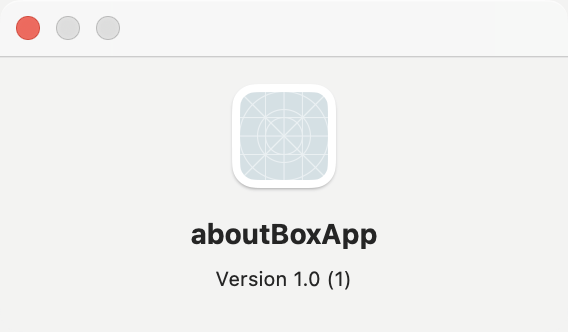
For something you get for free, it’s not too bad. The image is your application Icon, the title is your target name and the version is the application version from the bundle.
Enhancing the About Box
For all its functionality, it is a little basic. There is no copyright, no author name or any contact details. Anyone using your app is going to want to know more than the app name and version number!
As so often happens, there are multiple ways to address this shortfall and which route you go down depends on how complex you want to make your About box.
Extending the default about box
The easiest option will allow you to add formatted text at the bottom of the existing about box.
This is actually a very simple process and gives you a great deal of functionality for very little work. To achieve this, add a file called Credits.rtf to the project.
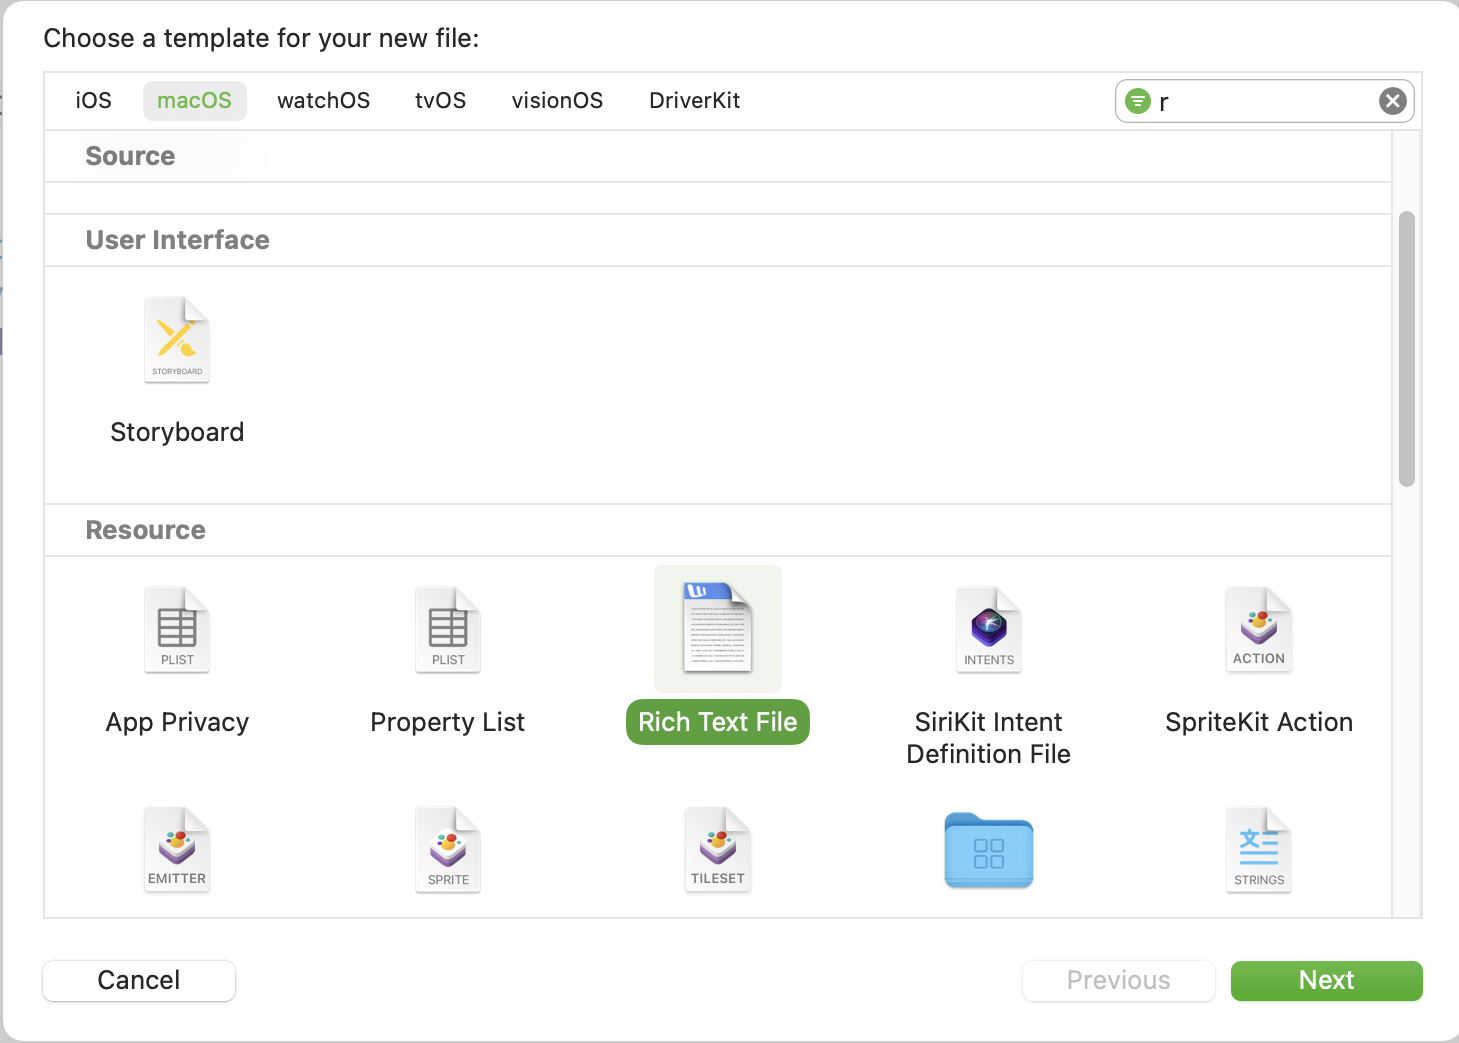
It's important to create a Rich Text File from the Resource section, so XCode can recognise it as a rich text file and provide you with an appropriate editor window. Open the Credits.rtf file and edit the text you want to see on the about box. For example:

You can edit the content to include any kind of text you want. For this example, I’ve added my name, web site address and a copyright notice; basic identification details. Because this file exists, when the about box is built by the system, it will include these details on the dialog that gets shown:
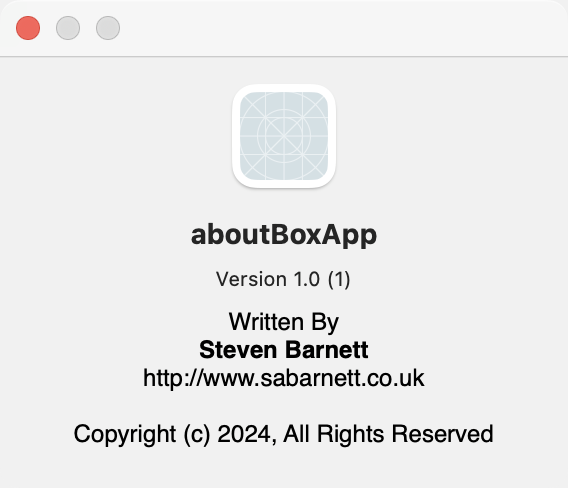
Not a bad result for so little work. It does, however, have one issue that we can’t fix using the Credits.rtf file; the link to my web site isn’t clickable. That may not be a big deal, but it would be nice to fix it.
Replacing the default About Box
When the default about box isn’t sufficient, we need to revert to replacing it entirely. This is going to be somewhat more complicated and will introduce more appKit code. We’re sticking with SwiftUI for the window design but will need appKit to get it displayed.
The first job is to replace the About menu item so we can control what happens when it’s clicked. To do that, we are going to need to do two things. Firstly, we are going to need to define a custom menu override for the "about app-name" menu item. Secondly, we're going to need to hook our application up to an AppKit style AppDelegate.
The first of our changes happens in the app definition file:
import Foundation
import SwiftUI

@main
struct aboutBoxAppApp: App {
    @NSApplicationDelegateAdaptor(AppDelegate.self) var appDelegate

    var body: some Scene {
        WindowGroup {
            ContentView()
        }

        .commands {
            CommandGroup(replacing: CommandGroupPlacement.appInfo) {
                Button("About \(Bundle.main.appName)") {
                    appDelegate.showAboutWnd()
                }
            }
        }
    }
}
The .commands modifier gives us access to the menu bar, allowing us to replace existing menu items, remove them completely or add new ones. In this specific case, we’re looking to replace what happens when the About menu is clicked. This particular menu item is referenced using the CommandGroupPlacement.appInfo enum value. Here we have elected to replace it with a button that will call the showAboutWnd method of the appDelegate.
To make the connection between our app and the app delegate, we specify the @NSApplicationDelegateAdapter which references our custom app delegate class.
We're going to need to create a file called 'appDelegate' into which we will place our app delegate code. The app delegate is going to be responsible for displaying our custom about box in place of the system default one.
import SwiftUI

class AppDelegate: NSObject, NSApplicationDelegate {

    private var aboutBoxWindowController: NSWindowController?

    func showAboutWnd() {
        if aboutBoxWindowController == nil {
            let styleMask: NSWindow.StyleMask = [.closable, .miniaturizable, .titled]
            let window = NSWindow()
            window.styleMask = styleMask
            window.title = "About \(Bundle.main.appName)"
            window.contentView = NSHostingView(rootView: AboutView())
            window.center()
            aboutBoxWindowController = NSWindowController(window: window)
        }

        aboutBoxWindowController?.showWindow(aboutBoxWindowController?.window)
    }
}
We define a variable called aboutBoxWindowController to keep track of whether the about box has been shown before. We don’t want to recreate it every time we display it. If it doesn’t currently exist, we create an NSWindow, which is an appKit style window, and assign our SwiftUI view as its contentView. This way we have an NSWindow with SwiftUI content. Finally, we tell the controller to display the window.
You are also going to have to import SwiftUI in order to use NSHostingView, so make sure you add tat to the top of your file.
If you compile at this stage, it’s not going to work! For the window title, we are assigning the appName. This isn’t an actual property of the bundle, so that property isn’t going to be found. We need to add that property by extending the Bundle to add a few properties that we might find useful here and in the about box.
Create a new Swift file and call it bundle+Extensions.swift to contain the extension code. Then create the code:
import Foundation

extension Bundle {
    public var appName: String { getInfo("CFBundleName")  }
    public var copyright: String {getInfo("NSHumanReadableCopyright")
        .replacing("\\\\n", with: "\n") }

    public var appBuild: String { getInfo("CFBundleVersion") }
    public var appVersionLong: String { getInfo("CFBundleShortVersionString") }

    fileprivate func getInfo(_ str: String) -> String {
        infoDictionary?[str] as? String ?? "⚠️"
    }
}
We’re almost there. We now have everything we need to replace the about box with our custom one, so now we just need to code a new About box.
import SwiftUI

struct AboutView: View {
    var body: some View {
        VStack(alignment: .leading) {
            HStack {
                Image(nsImage: NSImage(named: "AppIcon")!)
                VStack(alignment: .leading, spacing: 10) {
                    Text("\(Bundle.main.appName)")
                        .font(.system(size: 20, weight: .bold))
                        .textSelection(.enabled)

                    Text("Ver: \(Bundle.main.appVersionLong) (\(Bundle.main.appBuild)) ")
                        .textSelection(.enabled)
                }
            }

            Link(Constants.homeAddress,
                 destination: Constants.homeUrl )

            Text(Bundle.main.copyright)
                .font(.system(size: 10, weight: .thin))
                .multilineTextAlignment(.center)
        }
        .padding(20)
        .frame(minWidth: 350, minHeight: 200)
    }
}
Just to mix things up a little, we have changed the layout. We will have an image with the name and version of the application to the right. Under that, we will have a link to our support page. Following that we will have the application version and a copyright notice.
As before, if you compile this code now, it will fail to compile. I’ve added a couple of new constants; one for the support page message and one for the support page URL. You’ll need to add these to the Constants swift file.
import Foundation

struct Constants {
    //About box
    static let homeUrl: URL = URL(string: "http://www.sabarnett.co.uk")!
    static let homeAddress: String = "application support page"
}
This will give us code that compiles, but doesn’t run. It will crash when we display the about box because we have referenced the AppIcon image and we have not added an AppIcon yet. So, create yourself an AppIcon before you run this code. Once you have an AppIcon, run your code and select the About menu item.
If you’re struggling to create an AppIcon, take a look at a package on the Mac App Store called Bakery. It’s really useful for creating icons.
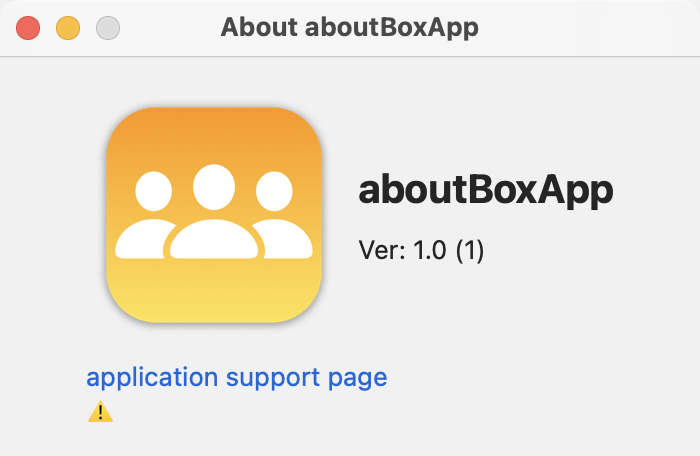
Oops, we have a problem. The copyright isn’t being shown.
By default, there isn’t a human readable copyright generated for our application, so we need to set the text to be displayed ourselves. We need to add this to the target. It’s easier to find, if you search!

Enter the copyright text you want to see against the Human Readable Copyright option. Once that’s entered, re-run your application and check that the copyright is being picked up correctly.
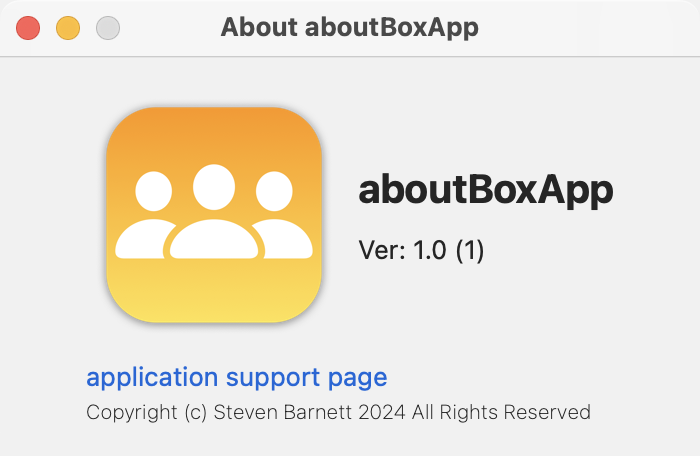
The content is entirely up to you. What we have done here is replace the baked-in about box with one that we can customise to fit our needs. While the process seems a little complicated it isn’t really. There are a few steps to follow but we gain a large degree of flexibility.
Also worth noting, if you click no the application support page text, your web browser will open up on the page you defined.
Get The Code


