There is a lot available to us in SwiftUI. If, however, you want to deal with files and folders, you’re going to have to resort to appKit as your API of choice. Not all Mac applications are going to need to interact with files selected by the user, so it may not be a problem. However, if you want to open a file, save (as) a file or select a folder, you’re out of luck with SwiftUI.
This section presents a file handling helper class for displaying open/save dialogs and for presenting a folder selection dialog. Basic functionality wrapped up in a class that you can customise as needed.
Testing the code
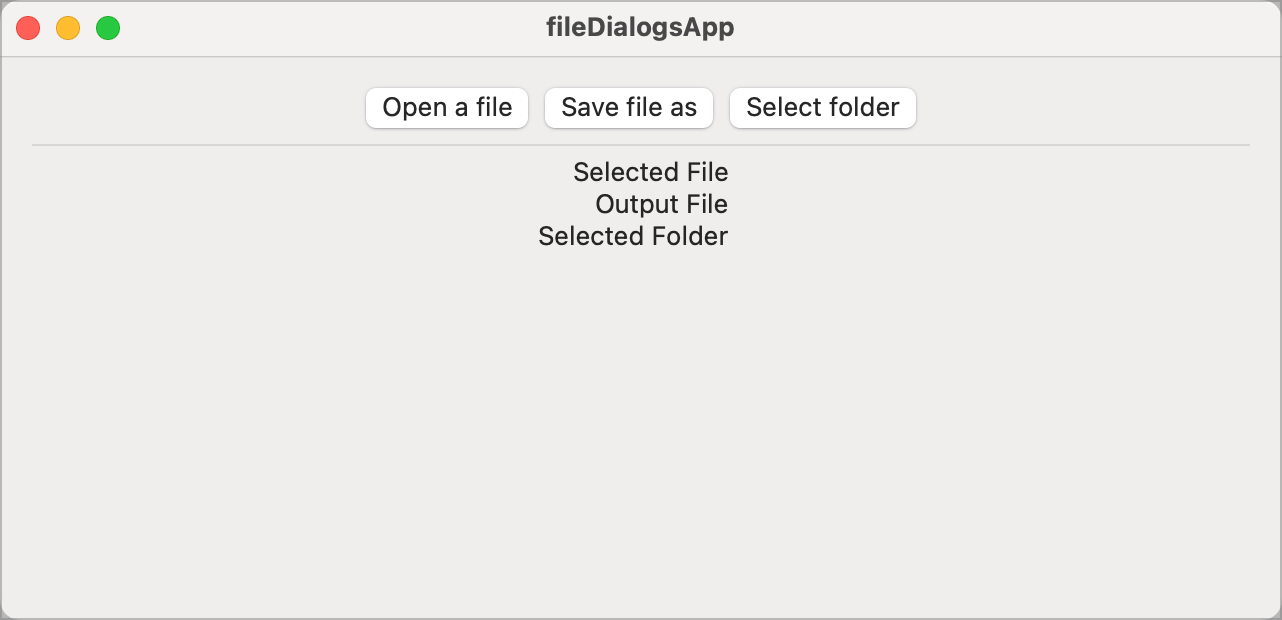
In order to test our class, we're going to need some test code up front. Since we're only doing basic testing, I have modified the ContentView to give us some basic functionality:
struct ContentView: View {

    @State var selectedInputFile: String = ""
    @State var selectedOutputFile: String = ""
    @State var selectedFolder: String = ""

    var body: some View {
        VStack {
            HStack {
                Button("Open a file") {
                }
                Button("Save file as") {
                }
                Button("Select folder") {
                }
            }
            Divider()

          	Form {
                LabeledContent("Selected File", value: selectedInputFile)
                LabeledContent("Output File", value: selectedOutputFile)
                LabeledContent("Selected Folder", value: selectedFolder)
            }

            Spacer()
        }
        .padding()
    }
}
This will give us a simple form with placeholder content that we can expand upon.
File Helpers
We're going to build our file helper code into a struct, so we need to create a fileHelpers.swift swift file and add in a few imports.
import Foundation
import appKit
import UniformTypeIdentifiers

struct FileHelpers {

}
We’re going to need to import appKit because we will need access to the NSApplication object for our application. UniformTypeIdentifiers came in after macOS 12.0. Previously, we used an array of strings to define the types of files we wanted to open. In more modern times, we’re using an array of UTType definitions and these are defined in the UniformTypeIdentifiers import.
Opening Files
The appKit way of prompting for a file is to create and display an NSOpenPanel. We check the response from the NSOpenPanel to see whether the user selected a file (or multiple files) or they cancelled. What we expect to get back, if the user selects one or more files, is the URL of the selected file(s). If. They cancel, we get nil.
Lets start by adding some code to the helper struct to create an NSOpenPanel. Since we may want to open files of different types, we will keep this code fairly generic.
struct FileHelpers {

    private func createOpenPanel(ofType: [UTType],
                                 withTitle: String?,
                                 allowsMultiple: Bool = false) -> NSOpenPanel {

        let openPrompt = NSOpenPanel()

        if let titlePrompt = withTitle {
            openPrompt.message = titlePrompt
        }

        openPrompt.allowsMultipleSelection = allowsMultiple
        openPrompt.canChooseDirectories = false
        openPrompt.canChooseFiles = true
        openPrompt.resolvesAliases = true
        openPrompt.allowedContentTypes = ofType

        return openPrompt
    }
}
This is the bare minimum code required to create an NSOpenPanel, specifying the title of the window that theuser sees and the type of file to be opened. When we have the NSOpenPanel, we are in a position to be able to. prompt the user.
In order to use this code, we need to add another function to our helper.
public static func selectSingleInputFile(ofType fileTypes: [UTType],
                                         withTitle windowTitle: String?) -> URL? {

    let openPrompt = FileHelpers().createOpenPanel(ofType: fileTypes,
                                                  withTitle: windowTitle)

    let result = openPrompt.runModal()

    if result == NSApplication.ModalResponse.OK {
        let fName = openPrompt.urls

        guard fName.count == 1 else { return nil }
        return fName[0].absoluteURL
    }

    return nil
}
The selectSingleInputFile function creates the NSOpenPanel and calls runModalto display it. When the user selects a file of the required type or presses cancel, runModal will end and pass the user response to the result variable.
We check if the user selected a file by checking the result for ModalResponse.OK. Anything else is going to be cancel. Assuming theuser did select a file, the NSOpenPanel will have the list of files selected in its urls property. In our case, we're checking for a single file andwill return the URL of that file.
While selectSingleInputFile will do the job for us, we can further abstract away the open function with file type specific functions that cover the range of file types we may want to open.
  public static func selectTextFile(withTitle windowTitle: String?) -> URL? {
      let textTypes: [UTType] = [UTType.text]
      return selectSingleInputFile(ofType: textTypes, withTitle: windowTitle)
  }
Here, we provide our callers with a simple function to call that is clear about what it does; selects a text file to be opened.
Back in the ContentView, we can now fill in the File Open button action.
  Button("Open a file") {
      if let selectedFile = FileHelpers.selectTextFile(
          withTitle: "Select a text file") {

          selectedInputFile = selectedFile.path()
      } else {
          selectedInputFile = "No file selected"
      }
  }
We call to the FileHelpers selectTextFile function to display the file selection dialog. We have set the title of the window. If the user selects a file it will be assigned to selectedFile which we display using the path function of the URL. If the user cancels, we display a simple error message.
The user will be presented with the open dialog.
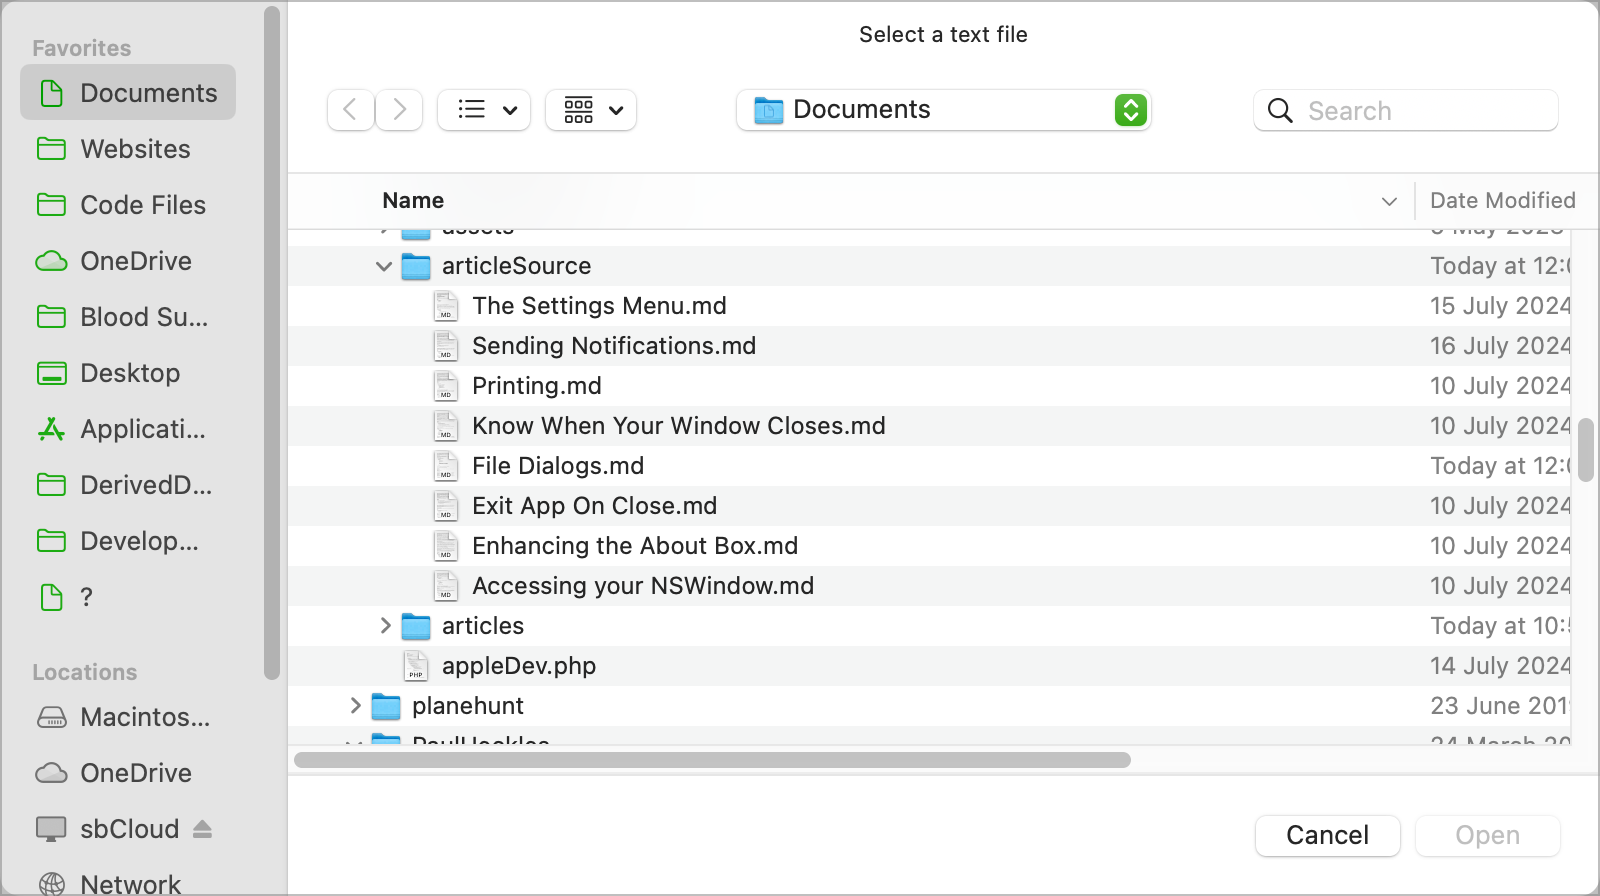
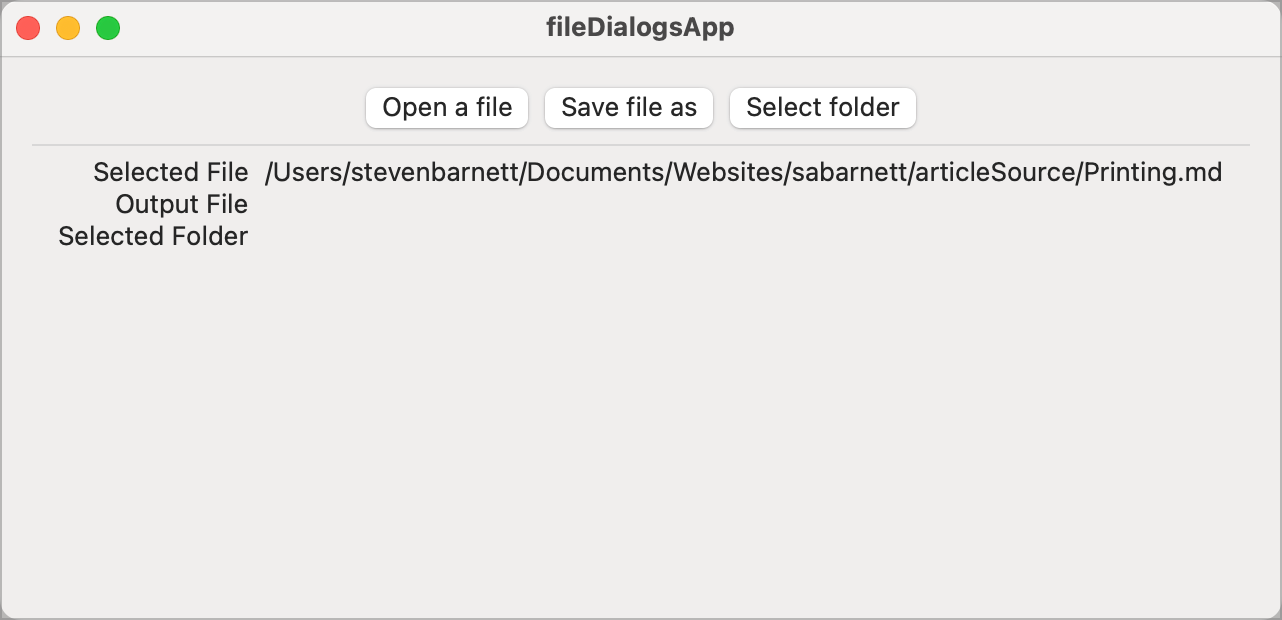
Assuning they select a file, the path will be displayed in the test app.
Saving Files
When we want to save a file and need to prompt the user for the name of the file to save, the processis very similar. The structure is the same;
- A function to create the NSSavePanel.
- A function that wraps the display of the panel and handles the result.
- One or more file type specific functions to call to prompt the user.
To save time, I present all three functions here in one go.
    // MARK: - Save functions

    public static func selectTextFileToSave(withTitle windowTitle: String?) -> URL? {
        let textTypes: [UTType] = [.plainText]
        return selectSaveFile(ofType: textTypes, withTitle: windowTitle)
    }

    public static func selectSaveFile(ofType fileTypes: [UTType],
                                      withTitle windowTitle: String?) -> URL? {

        let openPrompt = FileHelpers().createSavePanel(ofType: fileTypes,
                                                       withTitle: windowTitle)

        let result = openPrompt.runModal()

        if result == NSApplication.ModalResponse.OK {
            let fName = openPrompt.url
            return fName
        }

        return nil
    }

    private func createSavePanel(ofType: [UTType], withTitle: String?) -> NSSavePanel {

        let openPrompt = NSSavePanel()

        if let titlePrompt = withTitle {
            openPrompt.message = titlePrompt
        }

        openPrompt.allowsOtherFileTypes = true
        openPrompt.canCreateDirectories = true
        openPrompt.prompt = "Save As..."
        openPrompt.allowedContentTypes = ofType
        openPrompt.nameFieldLabel = "Enter file name:"
        openPrompt.nameFieldStringValue = "file"

        return openPrompt
    }
selectTextFileToSaveis our wrapper function that deals with defining the type of file we want to save and calls the more generic selectSaveFile function to display the save-as dialog. selectSaveFile calls to createSavePanel to create the required NSSavePanel.
There are a. number of options you can set for NSSavePanel. You won't normally set all of these but I wanted to make sure the options were highlighted.
- allowsOtherFileTypes allows us to save a file with a different file type to the ones we specified in the allowedContentTypes property. This would normally be left to default to false.
- prompt sets the text on the save button. It's sometimes useful to be able to change the caption to something more specific to the application.
- allowedContentTypes is as per the open panel. It lists the types of files you want the user to be able to create. The first item in this list becomes the default file extension in the save window.
- nameFieldLabel is the text that appears before the text box where you enter the file name. I would not normally expect to change this.
- nameFieldStringValue is the default file name that the user is expected to overtype. If you don’t specify a name, then a default will be generated for you with a date and time in it.
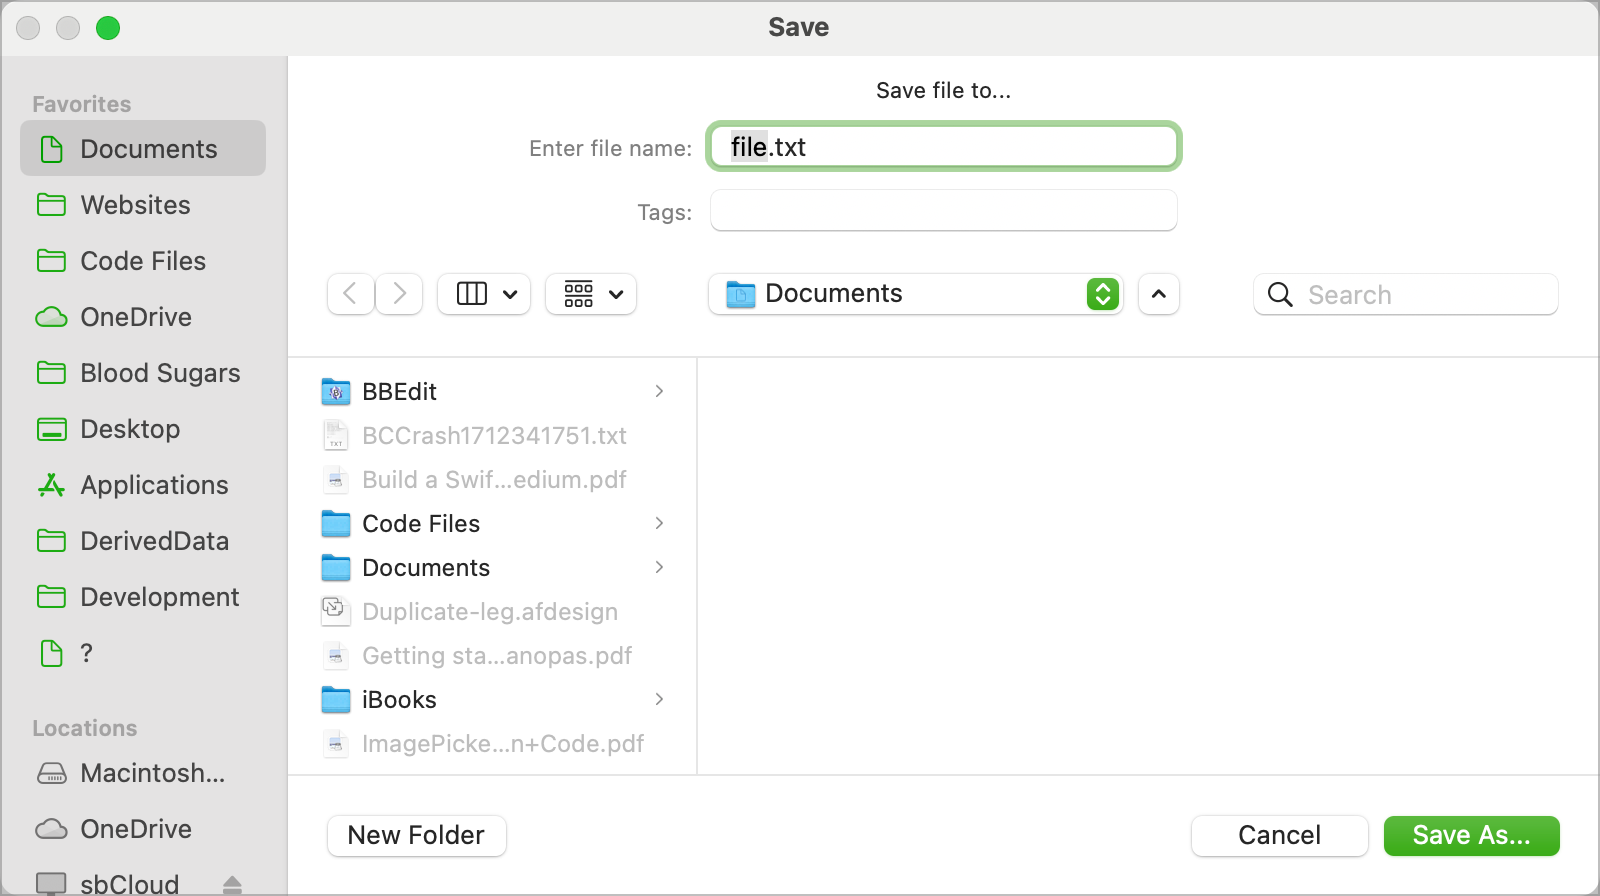
We can illustrate the use of this by adding code to the button in the ContentView.
  Button("Save file as") {
      if let saveTo = FileHelpers.selectTextFileToSave(withTitle: "Save file to...") {
          selectedOutputFile = saveTo.path()
      } else {
          selectedOutputFile = "No file selected - save cancelled"
      }
  }
If you run this code and press save-as, your app is going to crash! In the log, you will see this message:
Unable to display save panel: your app has the User Selected File Read entitlement but it needs User Selected File Read/Write to display save panels. Please ensure that your app's target capabilities include the proper entitlements.
So, what's going on?
Sandboxing
You have to turn to sandboxing for the root cause. In it's default state, you can't write files, so it makes sense to not allow you to display a file save popup... so it fails on you. Luckily, the error messages have improved over the years and Apple provide you the clues you need to fix it.
The fix is straight forward, when you know where to go. So go to the application target, select the Signing & Capabilities tab and take a look at the App Sandbox section. In there, you will see options for File Access.
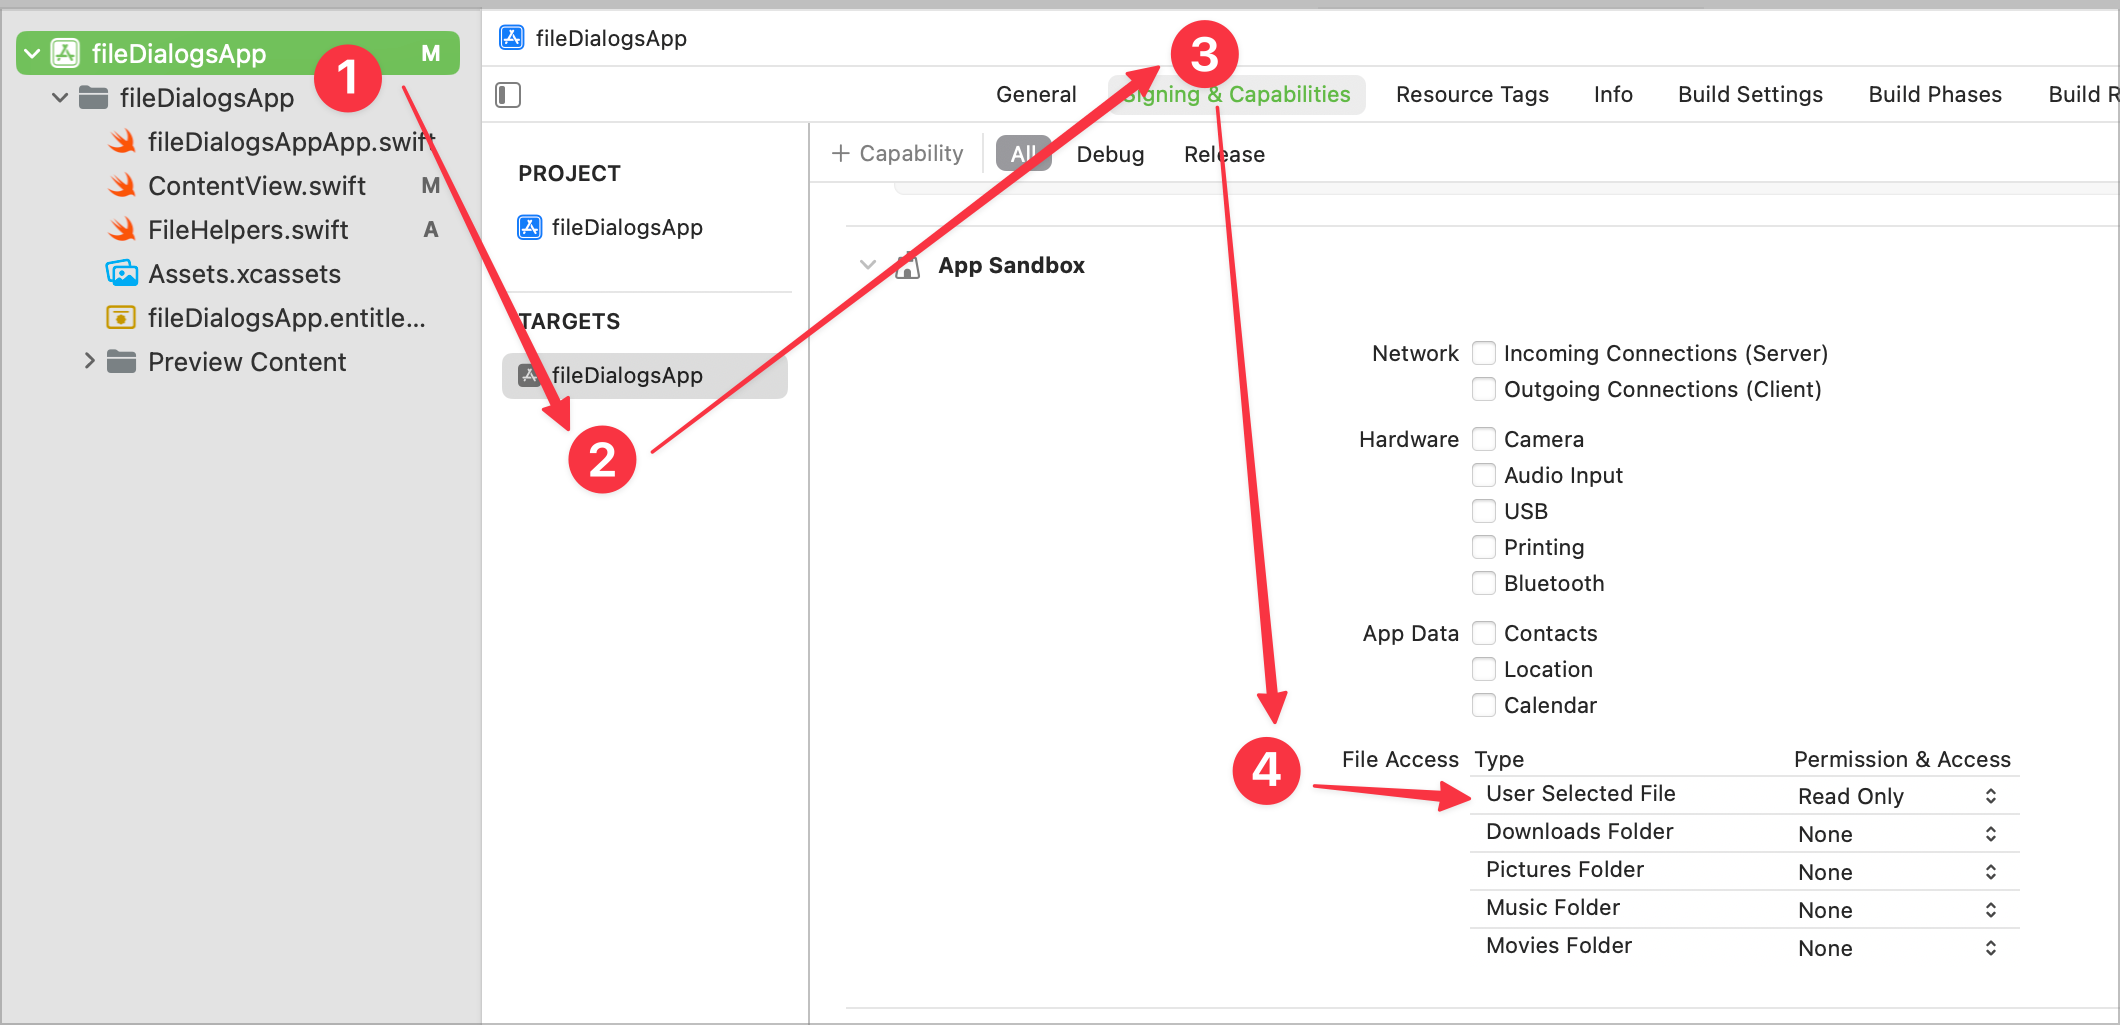
If you set the User Selected File option to Read/Write, and try again, you will see the save prompt.
If you then enter a file name, select the location and press the save-as button, the URL of the target file will be returned.
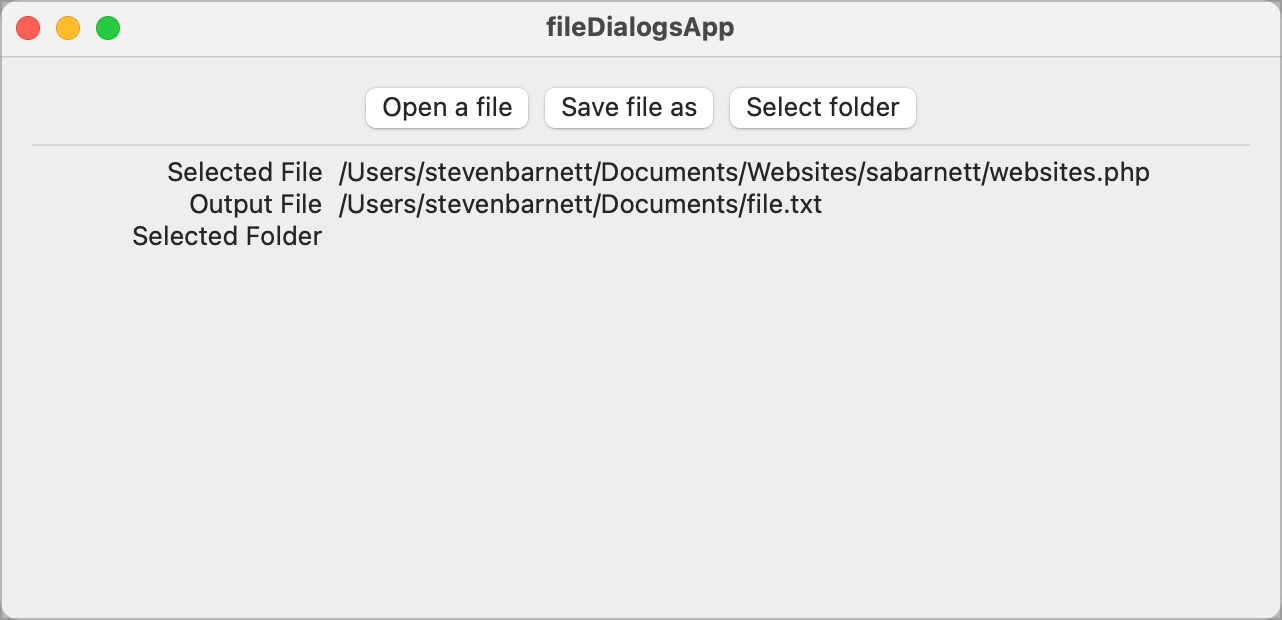
It is important to note, the fie will not be saved. It is the responsibility of your code to write the file. All we have done here is determine the URL of the target file. If the file already exists, the user will be asked whether they want to overwrite it or not. So, if a URL comes back to our code, we know that it is ok to write or overwrite the fie at the returned URL.
When you get the URL back, it’s worth noting that it may not have a file extension unless the user types one:
Save the file to: file:///Users/stevenbarnett/Documents/Documents/fileToSave
You will need to check for the extension and add it if necessary.
Selecting A Folder
The final functionality we want to create is the ability to select a folder. You might want to prompt for a folder when generating output or when inputting/writing multiple files. So, having the ability to select just a folder is useful to us.
There is, sadly, no specific functionality to be able to select a folder. So, we have to re-use the file selection code and change a few of the options. We can do this by adding the following function to our FileHelpers.
public static func selectFolder() -> URL? {

    let openPrompt = FileHelpers().createOpenPanel(ofType: [], withTitle: nil)

    openPrompt.canChooseDirectories = true
    openPrompt.canChooseFiles = false
    let result = openPrompt.runModal()

    if result == NSApplication.ModalResponse.OK {
        let fName = openPrompt.urls

        guard fName.count == 1 else { return nil }
        return fName[0].absoluteURL
    }

    return nil
}
We reuse the createOpenPanel code to create an NSOpenPanel with no specific file type specified or window title. Once we have the NSOpenPanel, we can modify it to our specific needs by setting options to allow directory selection and disallow file selection.
We can test this from out ContentView by filling out the last of the buttons.
Button("Select folder") {
    if let targetFolder = FileHelpers.selectFolder() {
        selectedFolder = targetFolder.path()
    } else {
        selectedFolder = "No folder was selected"
    }
}
The user will be prompted with an open dialog.
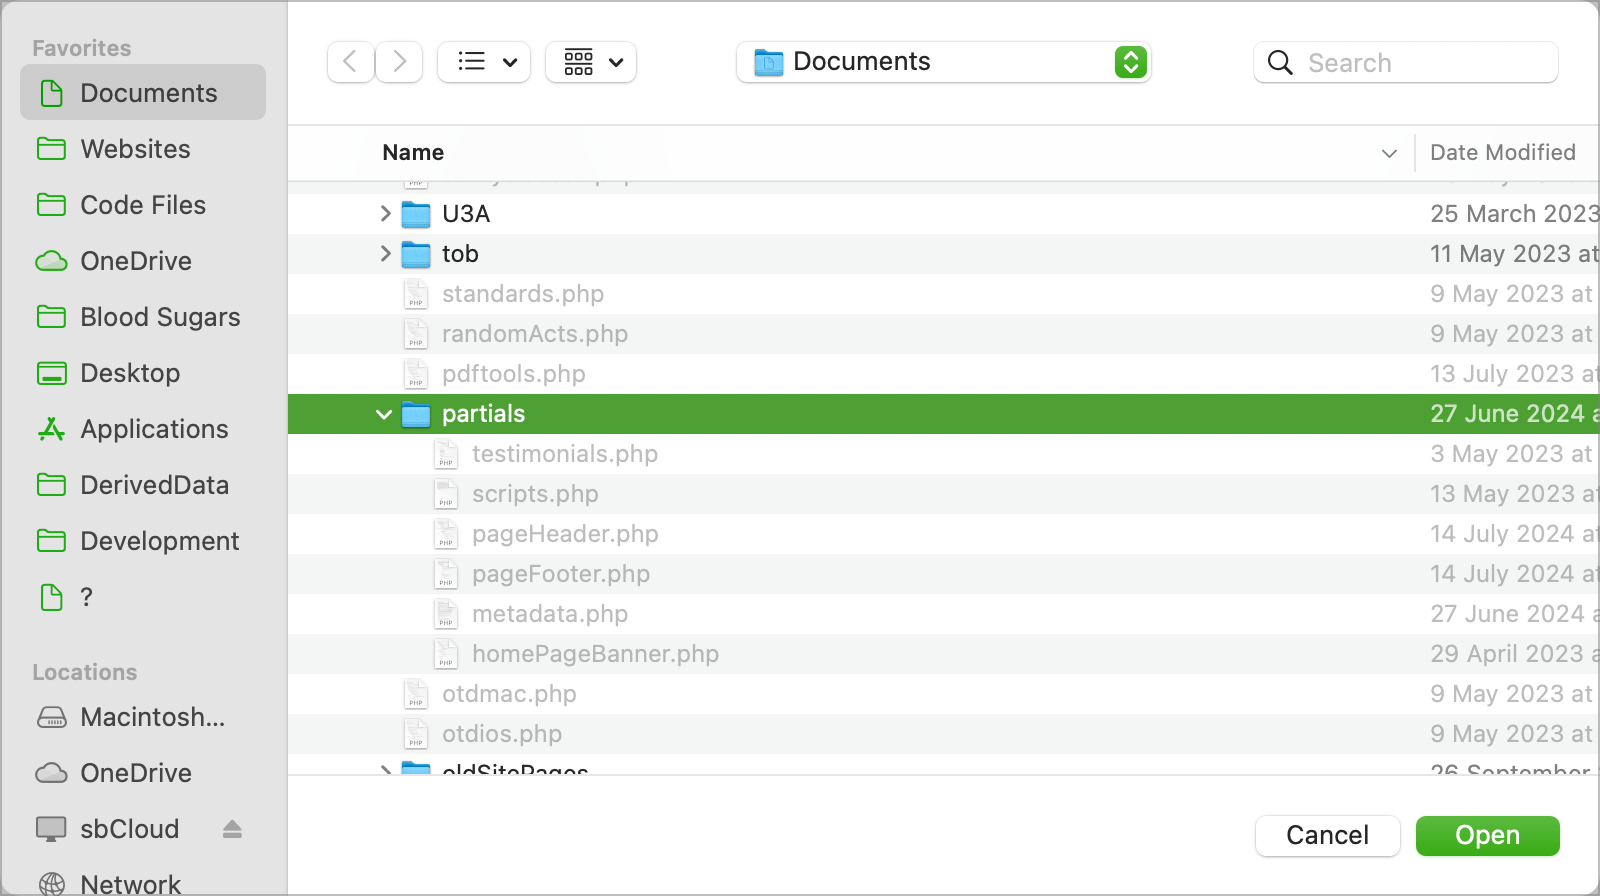
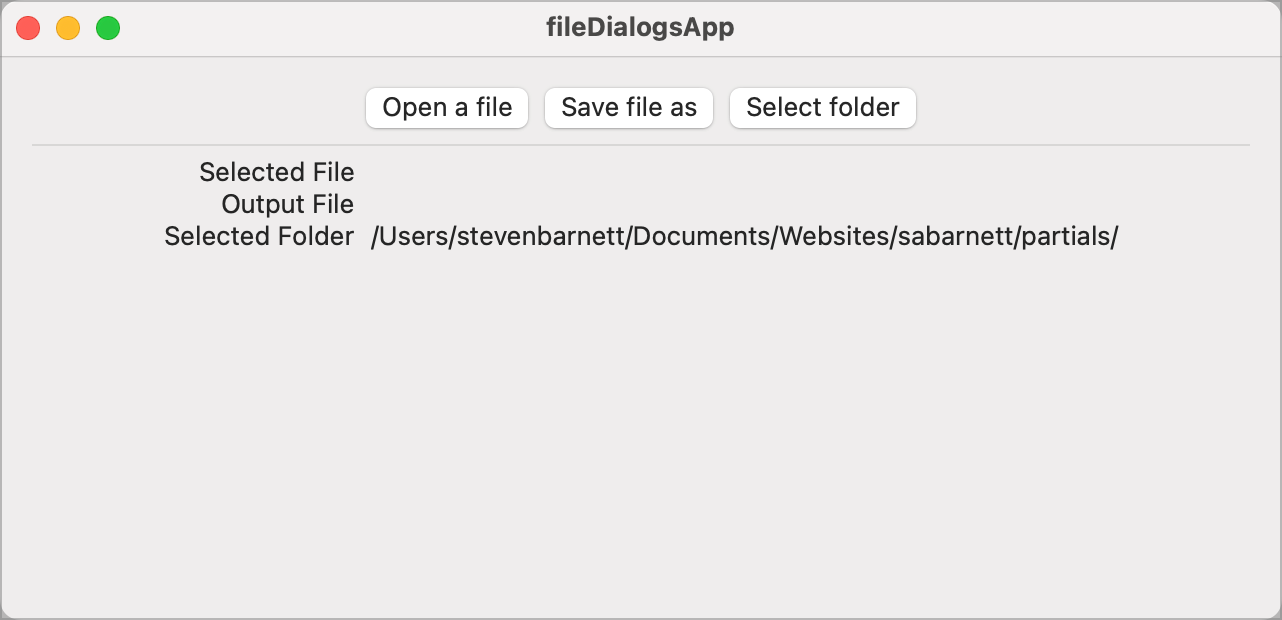
You will note that you can only select folders and that all files are greyed out. When you click Open the URL of the folder will be returned.
A Note On URL's
It is worth mentioning that the URL's you get back are encoded. If your file name or path contains spaces, for example, these will be encoded with %20.
/Users/stevenbarnett/Documents/Code%20Files/Utilities/SemanticUI/Semantic%20Colors/
This may or may not be a problem to your code. Just be aware of it and handle it if needed.
Get The Code